
Learn how to clean a waterpik water flosser or improve its performance with our step-by-step guide. Maintain optimal hygiene for a healthier smile!
Are you looking for an effective way to maintain optimal hygiene in your oral care routine? Cleaning your Waterpik Water Flosser regularly is the key! In this comprehensive guide, we will walk you through the step-by-step process of cleaning your Waterpik Water Flosser to ensure its longevity and peak performance. So, let’s dive in and discover how you can keep your Waterpik Water Flosser sparkling clean!
Introduction to Cleaning a Waterpik Water Flosser
Maintaining proper hygiene in our oral care routine is crucial for a healthy smile. One essential aspect often overlooked is the regular cleaning of our dental appliances, such as the Waterpik Water Flosser. Cleaning your Waterpik Water Flosser not only prolongs its lifespan but also ensures optimal performance, helping you achieve cleaner and healthier teeth and gums.
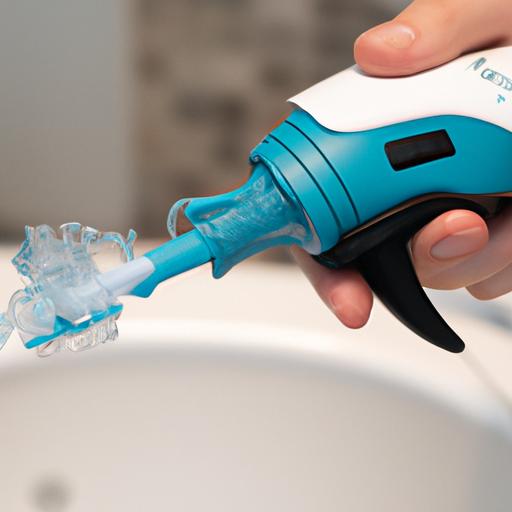
Step-by-step guide to clean a Waterpik Water Flosser
Step-by-Step Guide to Cleaning a Waterpik Water Flosser
Gather necessary materials and tools
Before diving into the cleaning process, it’s important to gather the necessary materials and tools. You will need mild soap, warm water, a soft-bristle toothbrush, vinegar or hydrogen peroxide, and a clean cloth or towel.
Remove and empty the water reservoir
Start by removing the water reservoir from the Water Flosser. Empty any remaining water into the sink and rinse out the reservoir thoroughly to remove any debris or buildup.
Disassemble the flosser components
Next, disassemble the various components of the Waterpik Water Flosser. This typically includes removing the flosser handle, nozzle, and any other removable attachments. Refer to your user manual for specific instructions on how to detach these components.
Clean the water reservoir and flosser components
Now it’s time to give your Waterpik Water Flosser a thorough cleaning. Prepare a solution of mild soap and warm water in a clean container. Submerge the water reservoir and its components in the soapy water and use a soft-bristle toothbrush to gently scrub away any residue or debris.
For deeper cleaning, you can use vinegar or hydrogen peroxide. Create a mixture of equal parts vinegar or hydrogen peroxide and water. Soak the components in this solution for a few minutes, then scrub and rinse thoroughly. Be sure to follow the manufacturer’s recommendations regarding the use of vinegar or hydrogen peroxide to avoid any damage.
Rinse and dry the components
After cleaning, rinse all the components with warm water to remove any soap or cleaning solution residue. Ensure that no traces of cleaning agents remain, as these can be harmful if ingested. Once rinsed, dry the components using a clean cloth or towel.
Reassemble the flosser for future use
Finally, reassemble the Waterpik Water Flosser by attaching the cleaned components back onto the flosser handle. Make sure everything is securely fastened. Your Waterpik Water Flosser is now ready for future use!

Additional tips for maintaining a clean Waterpik Water Flosser
Additional Tips for Maintaining a Clean Waterpik Water Flosser
While regular cleaning is essential, there are a few additional tips you can follow to maintain a clean and hygienic Waterpik Water Flosser:
Regularly replace the flosser’s tips and attachments
Over time, the flosser’s tips and attachments may wear out or accumulate bacteria. It’s crucial to replace these components periodically, as recommended by the manufacturer, to ensure optimal performance and hygiene. You can find a wide range of replacement tips and attachments for Waterpik Water Flossers on BestWaterFlosserHQ.com.
Use distilled water to prevent mineral buildup
Using distilled water in your Waterpik Water Flosser can help prevent mineral buildup and extend its lifespan. Tap water often contains minerals that can accumulate and clog the flosser, affecting its performance. By using distilled water, you can avoid these mineral deposits and ensure a clean and efficient water flow.
Store the flosser in a clean and dry environment
Proper storage plays a vital role in maintaining the cleanliness of your Waterpik Water Flosser. After each use, make sure to empty the water reservoir and store the flosser in a clean and dry environment. Avoid exposing it to excessive humidity or moisture, as this can promote the growth of mold or bacteria.
Check for any signs of wear and tear
Regularly inspect your Waterpik Water Flosser for any signs of wear and tear. If you notice cracks, leaks, or any other damage, it’s important to address these issues promptly. Contact the manufacturer or seek professional assistance to ensure the safety and optimal functioning of your Water Flosser.

Troubleshooting and common issues with Waterpik Water Flosser cleaning
Troubleshooting and Common Issues during Waterpik Water Flosser Cleaning
While cleaning your Waterpik Water Flosser, you may encounter a few common issues. Here are some troubleshooting tips to help you address them:
Dealing with clogged or blocked flosser components
If you notice that the water flow is weak or obstructed, it could indicate a clogged or blocked flosser component. Follow the cleaning steps mentioned earlier, paying extra attention to the nozzle and other attachments. Use a toothpick or the cleaning tool provided with your Waterpik Water Flosser to remove any debris or buildup that may be causing the blockage.
Addressing residual odor or taste after cleaning
If you experience an unpleasant odor or taste after cleaning your Waterpik Water Flosser, it could be due to residual cleaning agents. Ensure that you rinse all the components thoroughly with warm water, removing any soap or cleaning solution residue. If the issue persists, try running a few cycles of water through the flosser to flush out any remaining residue.
Handling leaks or water flow problems
Leaks or inconsistent water flow can be frustrating. Make sure all the components are properly assembled and securely attached. If leaks persist, check for any cracks or damage in the flosser’s seals or reservoir. It’s advisable to consult the manufacturer or seek professional assistance to resolve these issues.
Seeking professional assistance when necessary
If you encounter any complex issues or if your Waterpik Water Flosser requires extensive repairs or maintenance, it’s best to consult the manufacturer or seek professional assistance. They can guide you through troubleshooting steps or provide the necessary repairs to ensure the longevity and optimal performance of your Water Flosser.
Conclusion
Regularly cleaning your Waterpik Water Flosser is crucial for maintaining optimal hygiene and performance. By following our step-by-step guide and incorporating the additional tips mentioned, you can ensure that your Waterpik Water Flosser remains clean and efficient, providing you with a healthy smile for years to come. So, don’t delay – start cleaning your Waterpik Water Flosser today and experience the benefits of a clean and healthy oral care routine.
For more information on Waterpik Water Flossers and other oral care products, visit BestWaterFlosserHQ.com. Learn how to clean your Waterpik Water Flosser cordless model by visiting BestWaterFlosserHQ.com. If you’re in Canada, check out the Waterpik Cordless Water Flosser Canada guide for specific cleaning instructions tailored to your region.