
Discover the step-by-step guide on how to put water in a Waterpik for effective oral care. Achieve a healthier smile with these simple instructions!
Are you looking to enhance your oral care routine with a Waterpik but unsure how to properly fill it with water? Look no further! In this comprehensive guide, we will walk you through the simple steps of putting water in a Waterpik to ensure optimal usage and effectiveness. So, let’s dive in and discover the secrets to a healthier smile!
Introduction
When it comes to maintaining good oral hygiene, a Waterpik can be a game-changer. This innovative device utilizes a pulsating stream of water to remove plaque, bacteria, and debris from your teeth and gums, providing a thorough and refreshing clean. However, before you can experience the benefits of a Waterpik, it is crucial to understand how to properly put water in it.
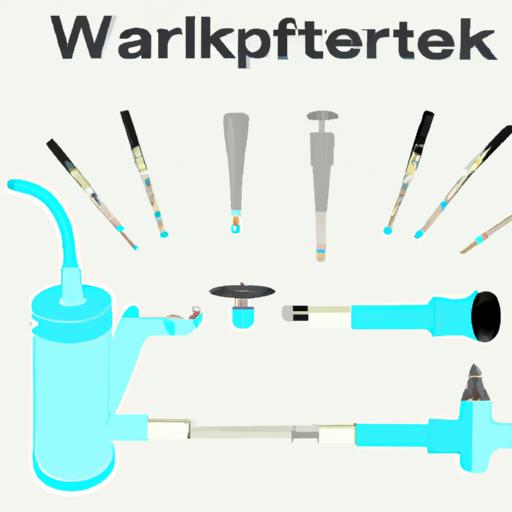
Understanding the components of a Waterpik
Understanding the Waterpik
Before we delve into the step-by-step guide, let’s familiarize ourselves with the different components of a Waterpik. The water reservoir, a key element of the device, holds the water that will be used during your oral care routine. It is important to note that the water reservoir must be properly filled to ensure a continuous and uninterrupted flow of water.
Putting water in a Waterpik: Step-by-step guide
Step-by-Step Guide on Putting Water in a Waterpik
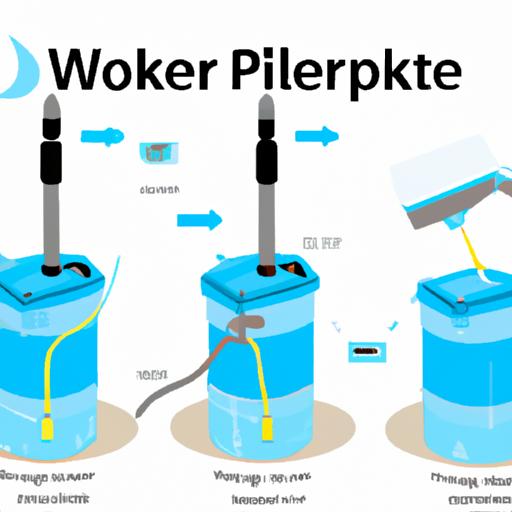
Now that we have a basic understanding of the Waterpik, let’s explore the step-by-step process of putting water in it to optimize its functionality and achieve the best oral care results.
A. Preparing the Water Reservoir
-
Remove the reservoir from the Waterpik unit: Start by separating the water reservoir from the main unit. This will allow for easier access and preparation.
-
Open and clean the reservoir: Carefully open the reservoir and separate it into two pieces. Give it a thorough rinse to ensure it is clean and free from any debris that may have accumulated.
B. Filling the Water Reservoir
-
Identify the maximum water level indicator: Take note of the maximum water level indicator located on the reservoir. This indicator ensures that you do not overfill the reservoir, preventing any potential spills or leaks.
-
Fill the reservoir with lukewarm water: Slowly fill the reservoir with lukewarm water, ensuring that you do not exceed the maximum water level indicated. Lukewarm water is recommended as it offers a comfortable sensation during the cleaning process.
-
Optional: Enhance your oral care routine: For an added boost to your oral care routine, consider adding mouthwash or other recommended solutions to the water in the reservoir. This can provide additional benefits such as fresh breath and enhanced gum health.
C. Reassembling and Attaching the Reservoir
-
Align and secure the reservoir: Carefully align the two pieces of the reservoir and securely fasten them together. This ensures that the reservoir is properly sealed, preventing any water leakage during usage.
-
Attach the reservoir to the Waterpik unit: Place the reservoir back onto the Waterpik unit, making sure it locks into place. This step ensures a seamless connection between the reservoir and the device, allowing for a continuous flow of water.
D. Testing and Adjusting the Water Flow
-
Turn on the Waterpik unit and adjust the pressure settings: Switch on the Waterpik unit and adjust the pressure settings according to your preference. Start with a lower pressure setting if you are new to Waterpiks, gradually increasing it as you become more comfortable.
-
Remove air bubbles: To ensure a smooth and uninterrupted flow of water, direct the nozzle tip towards the sink and let the water flow for a few seconds. This will help remove any air bubbles that may have formed, ensuring optimal performance.
-
Customize the pressure and nozzle tip: Experiment with different pressure settings and nozzle tips to find what works best for you. Everyone’s oral care needs are unique, so feel free to adjust these settings to suit your individual preferences.

Proper cleaning and maintenance of a Waterpik
Cleaning and Maintenance Tips
To keep your Waterpik functioning at its best and maintain good oral hygiene, it is crucial to follow proper cleaning and maintenance practices. Here are some helpful tips:
-
Clean the Waterpik unit and reservoir regularly according to the manufacturer’s instructions. This will prevent the buildup of bacteria and ensure optimal performance.
-
Replace the water in the reservoir after each use to prevent any accumulation of stagnant water, which may lead to bacterial growth.
-
Consider using specialized cleaning solutions designed for Waterpiks to maintain cleanliness and hygiene.
-
Store your Waterpik in a clean and dry area, away from any potential sources of contamination.
Conclusion
Congratulations! You are now equipped with the knowledge of how to properly put water in a Waterpik. By following the step-by-step guide outlined in this article, you can optimize the functionality of your Waterpik and achieve a refreshing and effective oral care routine. Remember to clean and maintain your Waterpik regularly to ensure its longevity and your continued oral health. So, go ahead, fill your Waterpik with water, and embark on a journey towards a healthier smile!
For more information on Waterpiks and their benefits, check out these resources: