
Learn how to charge your Waterpik water flosser for optimal performance! Follow our step-by-step guide and maximize battery life. Get started now!
Maintaining proper oral hygiene is crucial for overall health, and water flossers have become an essential tool in achieving optimal oral care. Among the top water flosser brands, Waterpik stands out for its exceptional performance and reliability. In this article, we will delve into the ins and outs of charging your Waterpik water flosser to ensure it performs at its best. Whether you’re a new user or simply looking for tips to maximize your device’s battery life, this comprehensive guide has got you covered.
Understanding the Charging Process of Waterpik Water Flossers
Understanding the Charging Process of Waterpik Water Flossers
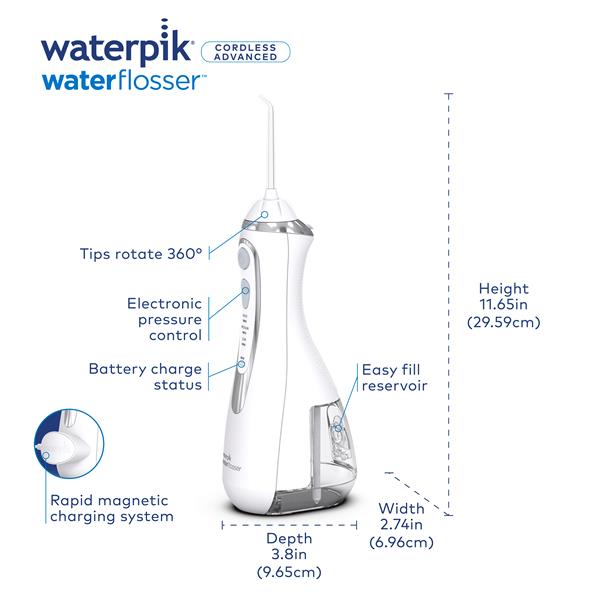
Before we dive into the specifics of charging, let’s understand how the charging mechanism works and the benefits it provides. The Waterpik water flosser comes with a rechargeable battery that powers the device, allowing you to use it cordlessly. This feature adds convenience and flexibility to your oral care routine, as you can use it anywhere without being tethered to a power outlet.
Proper charging is vital for maintaining the longevity and performance of your Waterpik water flosser. By following the recommended charging process, you can ensure that your device is always ready for use when you need it most.
Step-by-Step Guide on Charging a Waterpik Water Flosser
To help you navigate through the charging process seamlessly, here’s a step-by-step guide:
Step 1: Locate the Charging Port
Locate the charging port on your Waterpik water flosser. It is usually located at the bottom of the device, near the handle.
Step 2: Connect the Charger
Connect the charger to the charging port. Ensure that the charger is securely plugged in to establish a proper connection.
Step 3: Plug into a Power Source
Plug the charger into a power source such as a wall outlet or a USB port. Make sure the power source is reliable and provides a stable electricity supply.
Step 4: Monitor the Charging Process
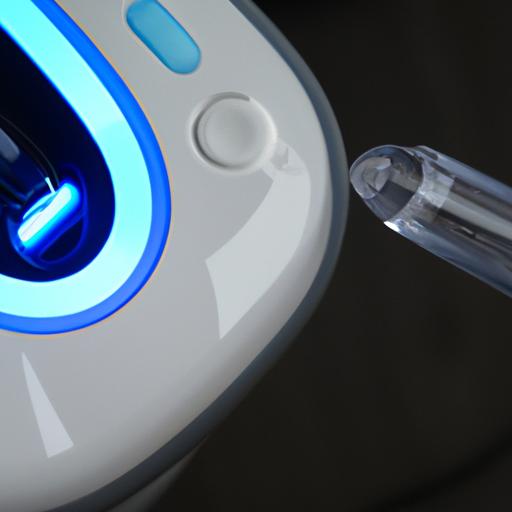
Once connected, the device will start charging. Keep an eye on the LED indicator light on your Waterpik water flosser. The light will typically turn on to indicate that the device is charging. It may take a few hours for the device to reach its full charge.
Step 5: Unplug and Disconnect
Once your Waterpik water flosser is fully charged, unplug the charger from the power source and disconnect it from the charging port. Your device is now ready to use wirelessly.
By following these simple steps, you can ensure that your Waterpik water flosser remains charged and ready for effective oral care.
Maximizing the Battery Life of Waterpik Water Flossers
To make the most of your Waterpik water flosser’s battery life, consider the following tips and recommendations:
Tip 1: Fully Drain the Battery
It is recommended to fully drain the battery at least once every few months. This practice helps calibrate the battery and maintain its optimal performance.
Tip 2: Avoid Overcharging
Overcharging can negatively impact the battery life of your Waterpik water flosser. Once the device is fully charged, promptly unplug it from the power source to prevent overcharging.
Tip 3: Store Properly
When not in use, store your Waterpik water flosser in a cool, dry place. Avoid exposing it to extreme temperatures or direct sunlight, as this can affect the battery life.
Tip 4: Utilize Power-Saving Features
Some Waterpik water flosser models offer power-saving features, such as an automatic shut-off after a certain period of inactivity. Utilize these features to conserve battery power and extend usage time between charges.
By implementing these tips, you can optimize the battery life of your Waterpik water flosser and ensure it remains in top-notch condition for years to come.
Conclusion
In conclusion, understanding the charging process of your Waterpik water flosser is essential for maintaining its optimal performance. By following the step-by-step guide provided in this article, you can easily charge your device and enjoy the benefits of cordless usage. Additionally, by implementing the tips to maximize battery life, you can extend usage time and enhance your overall oral care experience.
Investing in a Waterpik water flosser is investing in your oral health. So, charge it right, use it effectively, and smile confidently knowing you’re taking care of your teeth and gums with the best possible tool.
For more information about Waterpik water flossers and helpful reviews, visit BestWaterFlosserHQ.com. If you’re looking for specific information on Waterpik water flosser models available at Kohl’s, check out Waterpik Water Flosser Cordless Kohl’s. Troubleshooting issues related to your Waterpik water flosser not turning on? Find solutions at Waterpik Water Flosser Not Turning On. And if you’re curious about battery-operated water flossers, explore Waterpik Water Flosser Battery Operated for more insights.